Page 20 of 29 FirstFirst ... 101819202122 ... LastLast
Results 191 to 200 of 283

Thread: The Bob Joyce thread!: Restoration of a 1968 911 L Targa

  1. #191
    Quote Originally Posted by bob joyce View Post
    the real bonus of RD metal is that it is galvanized
    I did the front gas tank/suspension pan on my 912 years ago and to my surprise it was rusting just a few years afterword that was about 25 years ago
    True. Don’t want to revisit this area anytime soon or maybe ever!

  2. #192
    Senior Member
    Join Date
    Apr 2013
    Location
    Clayton, NC
    Posts
    380
    Bob - any more pictures of the Targa before you started restoration? We're reading the final chapter now, but love to see chapter 1.

  3. #193
    Senior Member bob joyce's Avatar
    Join Date
    Aug 2017
    Location
    el sobrante ca.
    Posts
    1,166
    OK.....
    I will start with just asking to look at the car as i knew it had been parked in the back yard for 40 years.
    As i dug it out of the bushes i saw that it was a 1968 911L Targa.
    Spent a couple of days digging it out just for the pleasure of seeing it.
    Out of the blue I was asked if i wanted it.
    I said the only way it could possibly be saved is if it had a donner rear torsion bar clip.
    It so happened that there was a wrecked but non rusty 1968 Name:  100_0389.jpg
Views: 161
Size:  127.7 KB911L coupe rear clip that could come with the car
    Last edited by bob joyce; 07-17-2023 at 06:03 PM.

  4. #194
    Senior Member bob joyce's Avatar
    Join Date
    Aug 2017
    Location
    el sobrante ca.
    Posts
    1,166
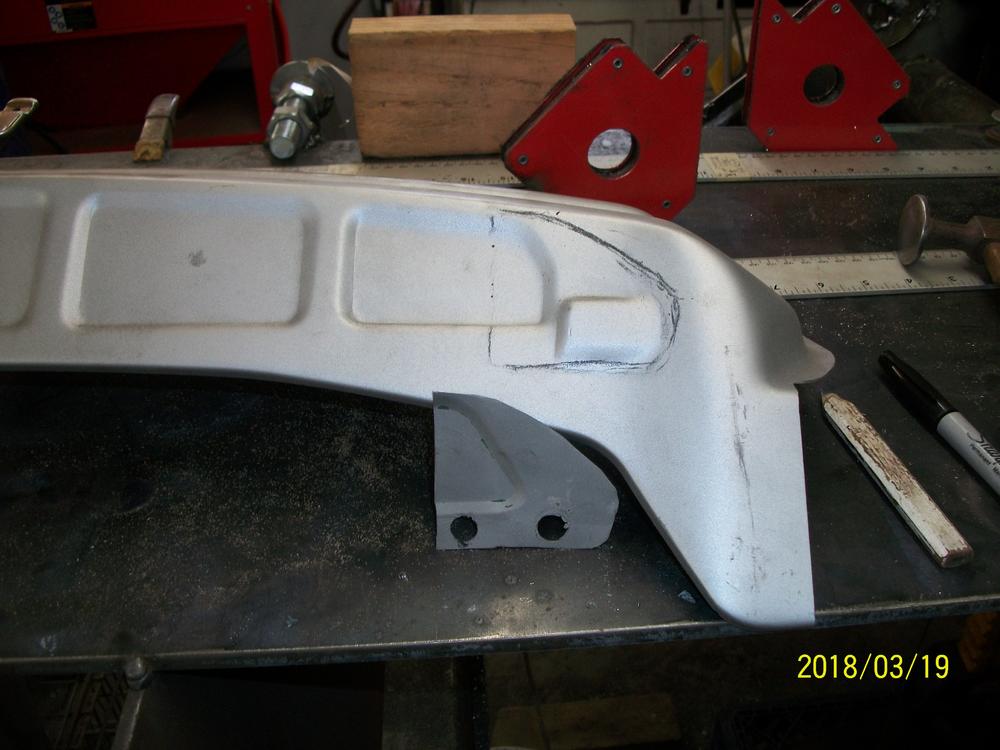
    So the first part of the project was to repair the rear piece.
    The process I chose was to remove all spot welds on the rear wheelhouse (both sides) and remove the rear cross member
    I would turn the car upside down and had a couple of steel plates cut so that I could mount the large plate on the transmission mounting points and elevate the other end back at the rear engine mounts such that it was on the Design Datum Plane at the transmissions elevation.
    I then installed 3/4" turnbuckle stations .One at the rear engine mount and one at the shock tower.
    With the spot welds removed it was easy to straighten the wheelhouse associated parts.
    I installed the engine mounting hardware to keep the rear dimension in place.Name:  100_0402 (1).jpg
Views: 146
Size:  98.5 KB

  5. #195
    Senior Member bob joyce's Avatar
    Join Date
    Aug 2017
    Location
    el sobrante ca.
    Posts
    1,166
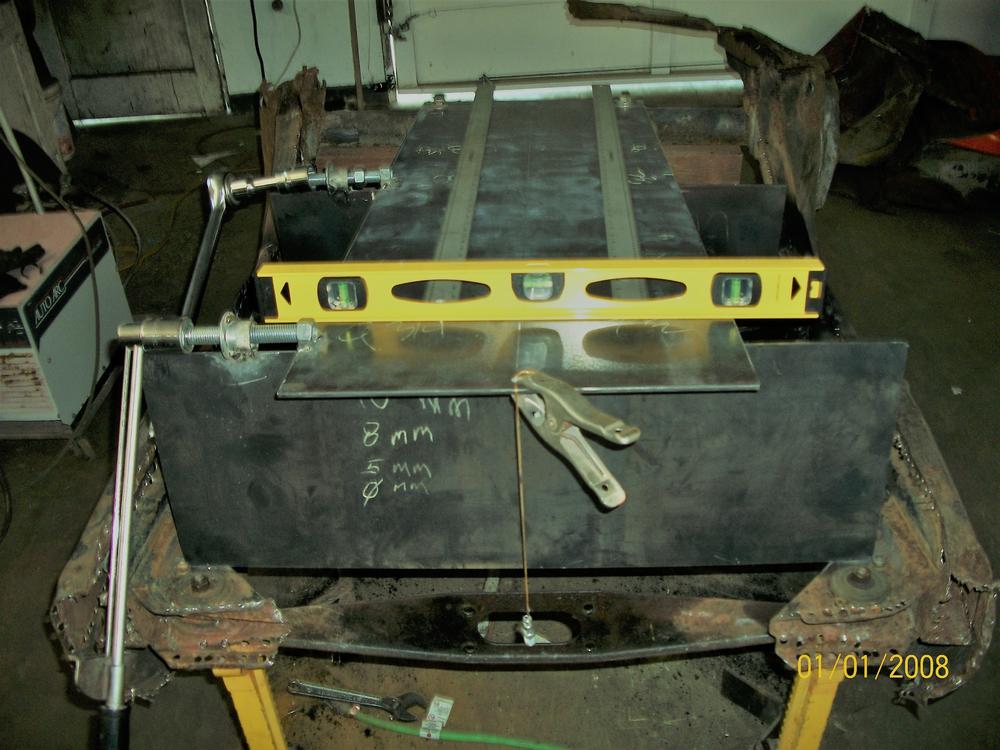
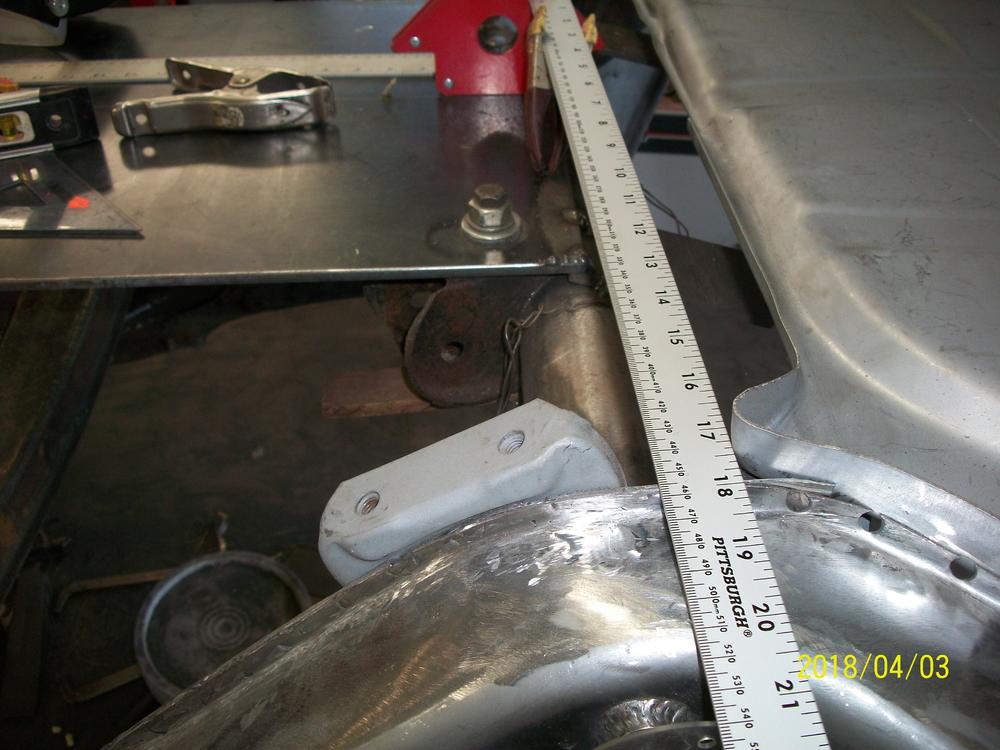
    so now that I got the wheelhouse and associated parts straightened.
    I carefully prepared and installed the torsion bar and wheelhouse areas using my Datum Plane Plate for reference and measurement.


    Name:  100_0446 (2).jpg
Views: 145
Size:  109.1 KB

    Name:  100_0444 (2).jpg
Views: 145
Size:  119.4 KB

    Name:  100_0463.jpg
Views: 142
Size:  86.6 KB
    Attached Images Attached Images  
    Last edited by bob joyce; 07-17-2023 at 06:16 PM.

  6. #196
    Senior Member bob joyce's Avatar
    Join Date
    Aug 2017
    Location
    el sobrante ca.
    Posts
    1,166
    then installed the rear crossmemberName:  100_0454 (3).jpg
Views: 145
Size:  77.1 KB

    Name:  100_0455 (3).jpg
Views: 148
Size:  83.8 KB

    Name:  100_0478.jpg
Views: 137
Size:  89.5 KB

    Name:  100_0481.jpg
Views: 136
Size:  79.9 KB

    Name:  100_0451 (3).jpg
Views: 147
Size:  73.6 KB

  7. #197
    Senior Member bob joyce's Avatar
    Join Date
    Aug 2017
    Location
    el sobrante ca.
    Posts
    1,166
    removed DatumPlate and epoxy primed
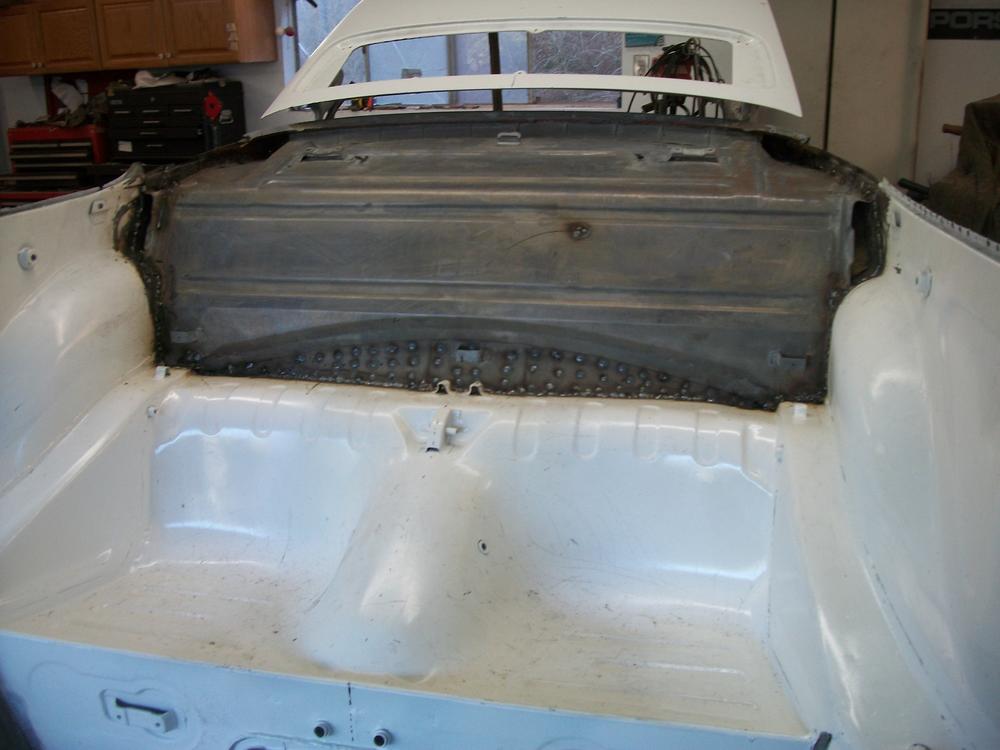
Name:  100_0499 (1).jpg
Views: 132
Size:  71.6 KB

    Name:  100_0501 (2).jpg
Views: 132
Size:  77.8 KB

  8. #198
    Senior Member bob joyce's Avatar
    Join Date
    Aug 2017
    Location
    el sobrante ca.
    Posts
    1,166
    Cleaned up and epoxy rear seatName:  100_0503 (2).jpg
Views: 130
Size:  47.2 KB and partial bulkhead

  9. #199
    Senior Member bob joyce's Avatar
    Join Date
    Aug 2017
    Location
    el sobrante ca.
    Posts
    1,166
    installed rear seat area and rear parcel trayName:  100_0548.jpg
Views: 132
Size:  74.7 KB

    Name:  100_0545.jpg
Views: 132
Size:  66.9 KB

    Name:  100_0551.jpg
Views: 132
Size:  94.7 KB

    Name:  100_0570.jpg
Views: 131
Size:  62.0 KB
    Last edited by bob joyce; 07-17-2023 at 06:45 PM.

  10. #200
    Senior Member bob joyce's Avatar
    Join Date
    Aug 2017
    Location
    el sobrante ca.
    Posts
    1,166
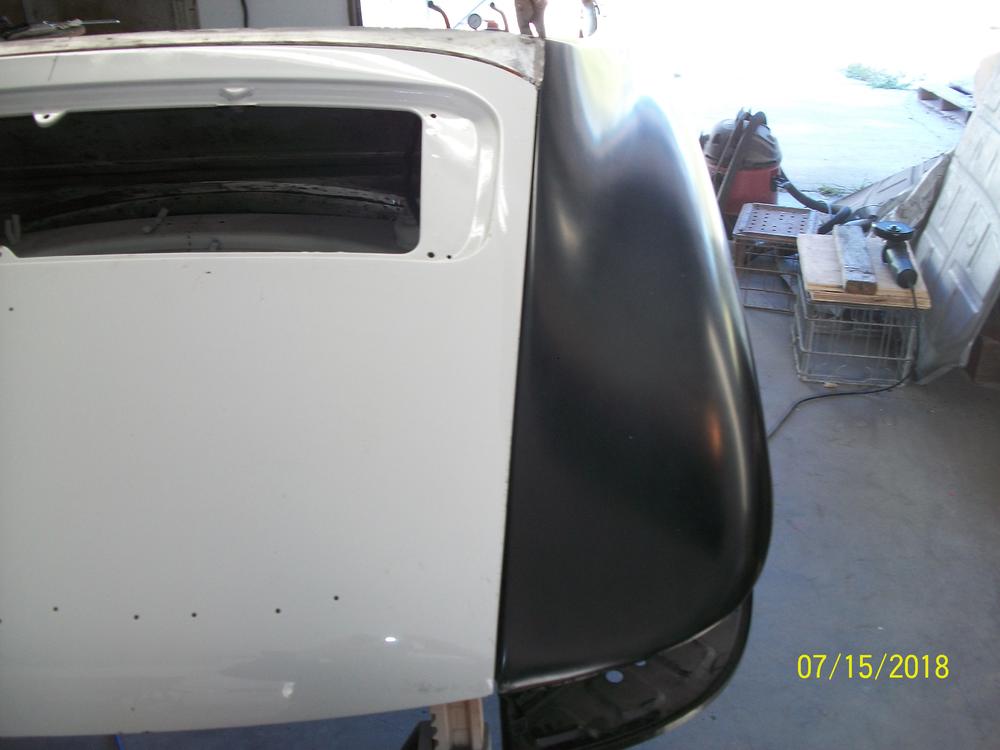
    Mocked up the rear quarter panels and engine lid to assure correctness.Name:  100_0552.jpg
Views: 130
Size:  67.6 KB.

    Name:  100_0553.jpg
Views: 131
Size:  82.2 KB

    Name:  100_0554.jpg
Views: 129
Size:  54.6 KB

    Name:  100_0555.jpg
Views: 128
Size:  49.5 KB

Posting Permissions

  • You may not post new threads
  • You may not post replies
  • You may not post attachments
  • You may not edit your posts
  •  

Message Board Disclaimer and Terms of Use
This is a public forum. Messages posted here can be viewed by the public. The Early 911S Registry is not responsible for messages posted in its online forums, and any message will express the views of the author and not the Early 911S Registry. Use of online forums shall constitute the agreement of the user not to post anything of religious or political content, false and defamatory, inaccurate, abusive, vulgar, hateful, harassing, obscene, profane, sexually oriented, threatening, invasive of a person's privacy, or otherwise to violate the law and the further agreement of the user to be solely responsible for and hold the Early 911S Registry harmless in the event of any claim based on their message. Any viewer who finds a message objectionable should contact us immediately by email. The Early 911S Registry has the ability to remove objectionable messages and we will make every effort to do so, within a reasonable time frame, if we determine that removal is necessary.