Page 2 of 28 FirstFirst 123412 ... LastLast
Results 11 to 20 of 280

Thread: The Bob Joyce thread!: Restoration of a 1968 911 L Targa

  1. #11
    Senior Member bob joyce's Avatar
    Join Date
    Aug 2017
    Location
    el sobrante ca.
    Posts
    1,163
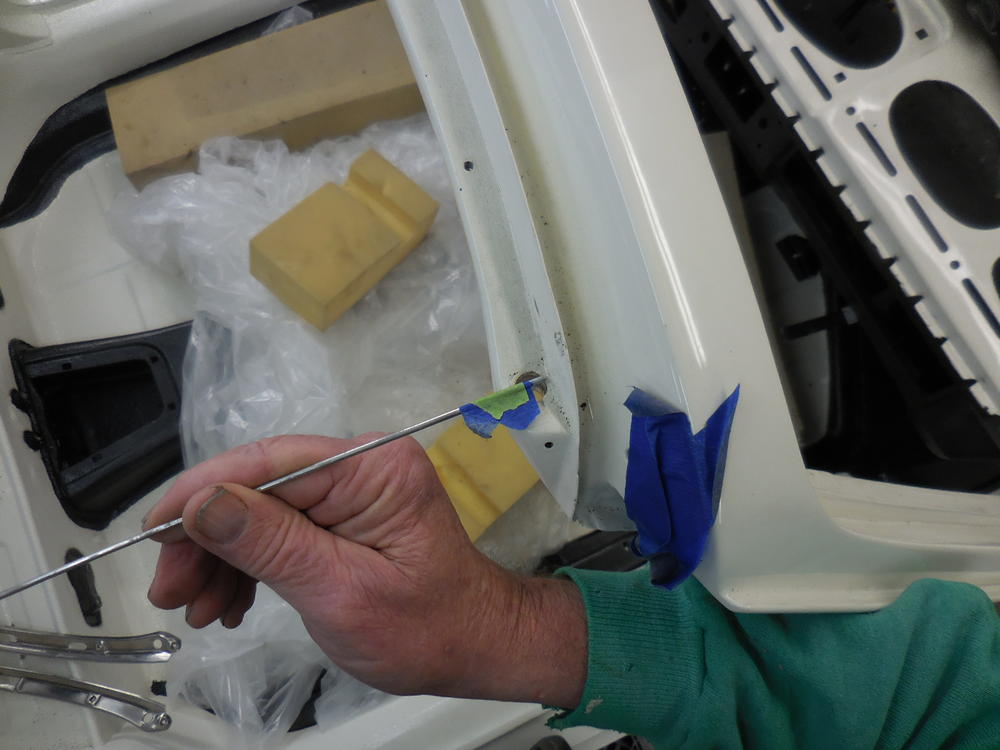
    Found a difference of 2mm from right side to left side, front to back....
    A few weeks ago, someone posted a factory video circa 1972. It showed a worker in the background, standing in a Targa and he was pulling on "wood tool" to bend the window opening back.
    Looked easy...
    I looked at the video again. It was "1973 Porsche 911 Factory Tour" Time 12:50 of 31:32.
    The tool was really cool. It was hollow, and inside the hollow tool was a length of a gauge that he would pull out and "go-no-go measure"
    Well, after two days, Sore neck, arms, back, legs and even blisters later .....I GOT IT.....
    Name:  DSCN1166.jpg
Views: 1061
Size:  66.4 KB
    Name:  DSCN1172.jpg
Views: 1068
Size:  51.8 KB
    Name:  DSCN1173.jpg
Views: 1034
Size:  70.3 KB
    Last edited by bob joyce; 12-30-2021 at 08:53 AM.

  2. #12
    Senior Member bob joyce's Avatar
    Join Date
    Aug 2017
    Location
    el sobrante ca.
    Posts
    1,163
    cleaned -up, straightened and welded cracks on the aluminum roof panels...
    interesting that the perimeter channels were filled with foam.
    the pictures that i have seen on the net show empty channels.
    here is a picture of the removed foam....Name:  DSCN1176.jpg
Views: 958
Size:  76.7 KB
    Name:  DSCN1177.jpg
Views: 960
Size:  65.2 KB
    Last edited by bob joyce; 01-02-2022 at 04:55 PM. Reason: picture

  3. #13
    Senior Member bob joyce's Avatar
    Join Date
    Aug 2017
    Location
    el sobrante ca.
    Posts
    1,163
    I used tap plastics foam: modified
    It is very crumbly and breaks/snaps like a bread stick.
    So.... I added Ditzler flex agent and produced a stiff yet flexible and sand able product.
    The additive produces extreme product characteristics depending on how much flex agent is added.
    For instance, one cap full of flex agent added to a couple ounces of foam produces a very flexible rubbery product.Name:  DSCN1179.jpg
Views: 907
Size:  82.7 KB


    Name:  DSCN1180.jpg
Views: 905
Size:  64.5 KB
    Last edited by bob joyce; 01-06-2022 at 05:41 PM.

  4. #14
    Senior Member bob joyce's Avatar
    Join Date
    Aug 2017
    Location
    el sobrante ca.
    Posts
    1,163
    So .... here is the foam being shaped.
    I actually sawed the bulk off
    then Shure formed the rest...
    Also, I tested each poor because they were all mixed by the seat of my pants
    Here is a picture that is representative of all the pours but one
    I removed one poor because it was too rubbery and could not be sanded
    If you mix this tap foam without a flex agent, it will be way to brittle.

    Name:  DSCN1181.jpg
Views: 857
Size:  97.9 KB

    Name:  DSCN1182.jpg
Views: 851
Size:  51.7 KB

  5. #15
    Senior Member
    Join Date
    May 2019
    Location
    Sunny Scottsdale, Arizona
    Posts
    107
    Enjoying these updates

  6. #16
    Senior Member bob joyce's Avatar
    Join Date
    Aug 2017
    Location
    el sobrante ca.
    Posts
    1,163
    Here is a picture of the refurbished Targa folding roof panels.
    And a picture of the sand blasted Targa folding roof frame members....
    Name:  DSCN1183.jpg
Views: 781
Size:  78.6 KB


    Name:  DSCN1184.jpg
Views: 774
Size:  75.9 KB

  7. #17
    Senior Member bob joyce's Avatar
    Join Date
    Aug 2017
    Location
    el sobrante ca.
    Posts
    1,163
    Painted the Targa folding top frame members...Name:  DSCN1186.jpg
Views: 679
Size:  78.5 KB

  8. #18
    Senior Member
    Join Date
    Feb 2020
    Location
    NW CT
    Posts
    359
    Cool stuff, it should be its own thread on targa top repair!
    MBR #3926
    '71 911 T Targa "Rick White"
    '71 911 E "Karen"
    '70 S/T
    '16 CD
    '10 E61 "Vomit Comet"

  9. #19
    Bob, The outer aluminum drip rails on my car need to be painted. After 55 years the paint is starting to chip. Can those be removed without taking the top all apart?
    It's 67.

  10. #20
    Senior Member bob joyce's Avatar
    Join Date
    Aug 2017
    Location
    el sobrante ca.
    Posts
    1,163
    yes.... it is fairly straight forward... just remove the screws for all the associated parts,
    should take only a few minutes, unless the screws fight you....
    obviously, you will be removing the rubber weather strip and that depends on how/if, it was glued in...
    P.S. i will paint my outer trim with Sem trim black. it adheres to aluminum well and is fairly durable...
    if you encounter a strip of cardboard, that is shimming material and should be reinstalled for proper fit....

Posting Permissions

  • You may not post new threads
  • You may not post replies
  • You may not post attachments
  • You may not edit your posts
  •  

Message Board Disclaimer and Terms of Use
This is a public forum. Messages posted here can be viewed by the public. The Early 911S Registry is not responsible for messages posted in its online forums, and any message will express the views of the author and not the Early 911S Registry. Use of online forums shall constitute the agreement of the user not to post anything of religious or political content, false and defamatory, inaccurate, abusive, vulgar, hateful, harassing, obscene, profane, sexually oriented, threatening, invasive of a person's privacy, or otherwise to violate the law and the further agreement of the user to be solely responsible for and hold the Early 911S Registry harmless in the event of any claim based on their message. Any viewer who finds a message objectionable should contact us immediately by email. The Early 911S Registry has the ability to remove objectionable messages and we will make every effort to do so, within a reasonable time frame, if we determine that removal is necessary.